Saving editing and making segments visible on dashboard
Saving Segments
To get started, navigate to your client list page Clients -> Clients
Start creating your audience segment by adding rules on the left hand side.
Once you’ve combined the correct filters and rules which yields your desired audience segment, it’s time to save the segment.
To save a segment, simply click the green save changes button below your last rule group.
Benefits of Saved Segments
- Apply saved segments to use in Automation Setup Step 2 - Audience
- Create quick reports - (Club Counts, Late Cancellations, birthdays approaching)
Editing Segments
Editing segments from your client dashboard is different than editing the audience connected to an automation. To learn how to edit audience connected to automations, click here.
Editing Segment Rules
To edit the audience rules for an existing segment:
- Select the segment from the
custom segmentdropdown menu located on your client list page - Edit the rules of your audience segment
- Click the green
save changesbutton below your last rule group to save updated changes
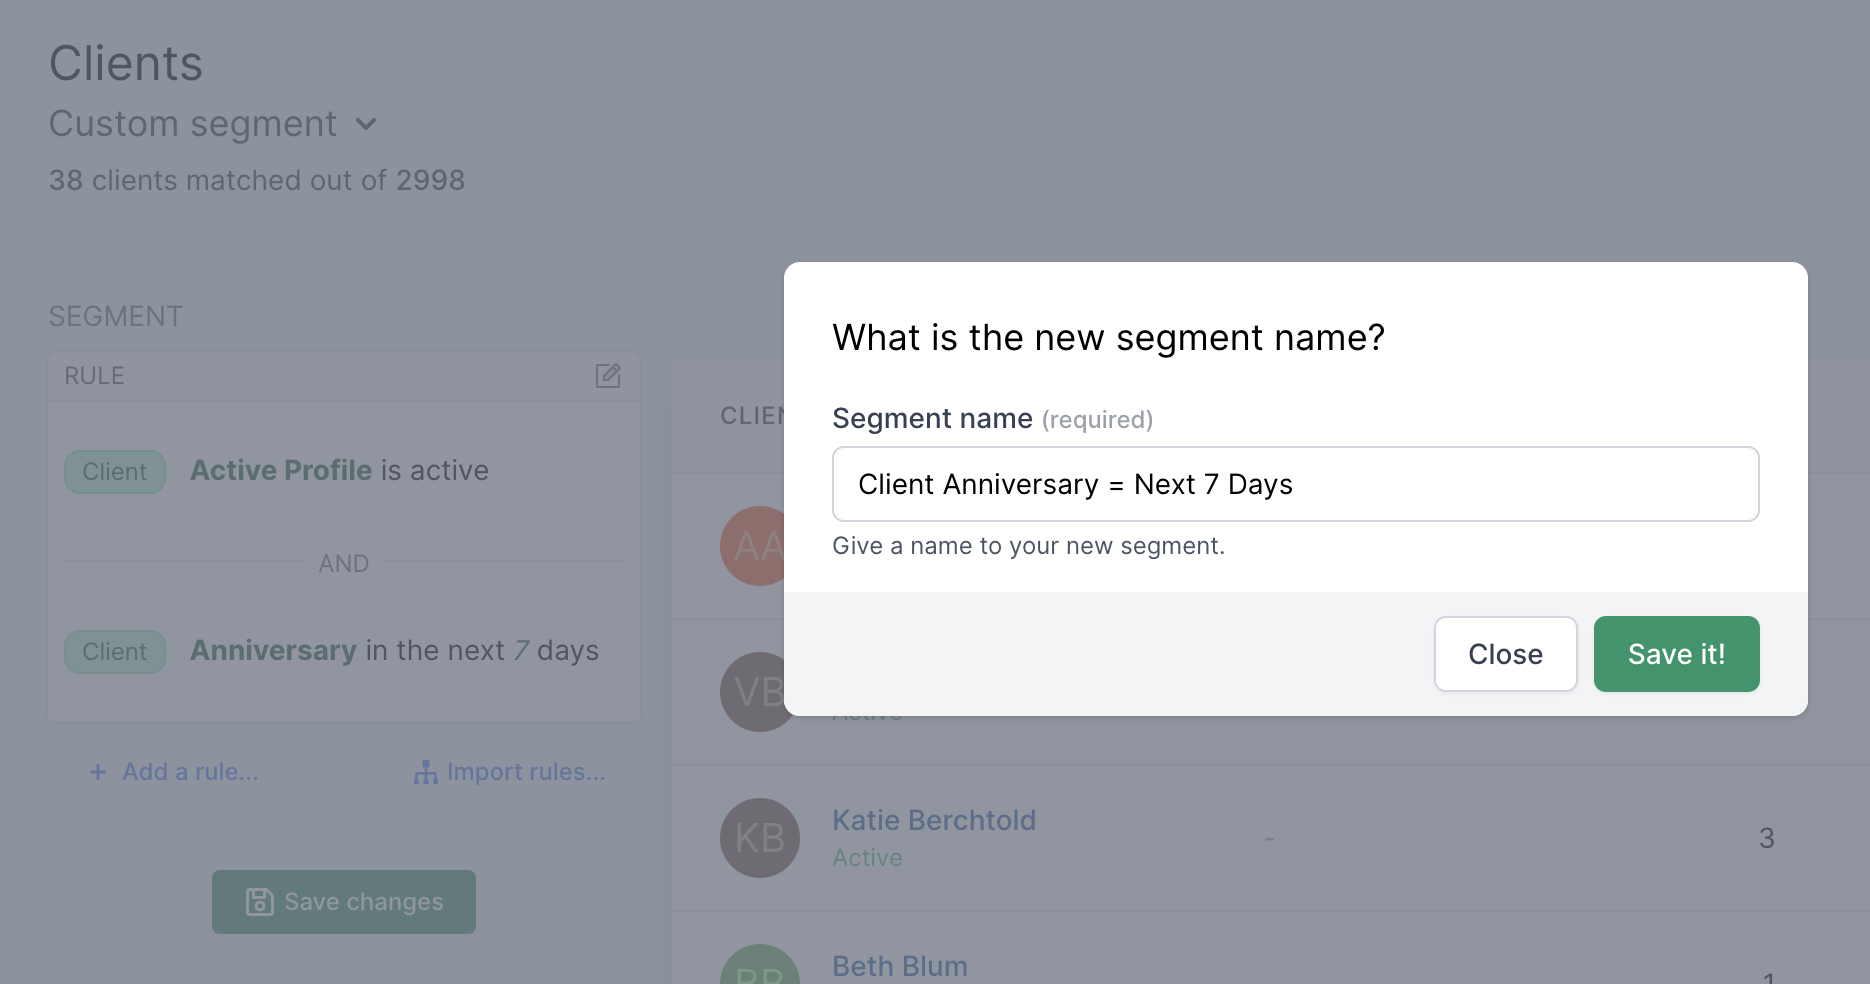
Editing Segment Name
To edit the name of an existing segment:
- Select the segment from the
custom segmentdropdown menu located on your client list page - Click the cog icon located on the right side of the screen, aligned with your audience name
- Edit the field
segment name - Click green button
updateto confirm segment name change
![]()
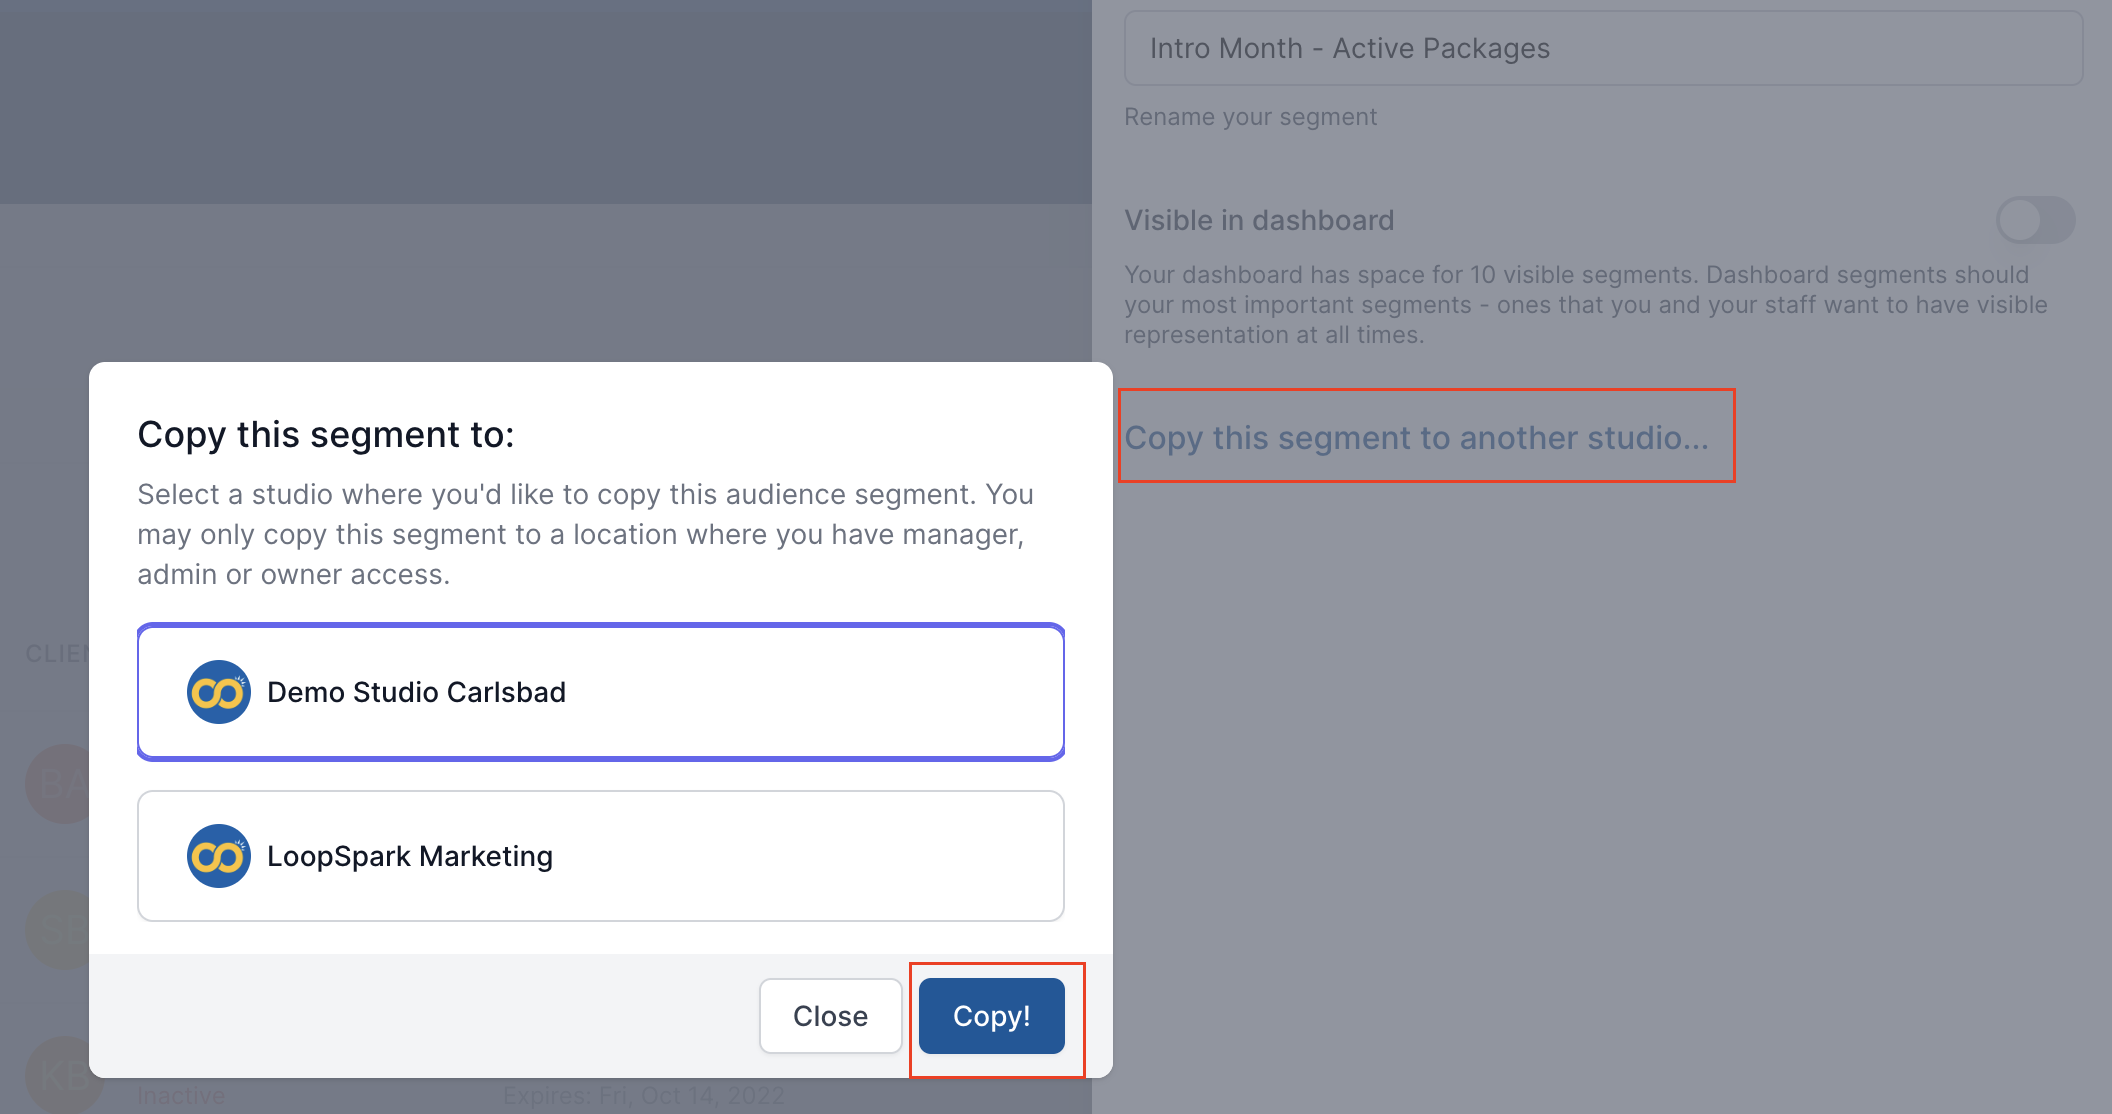
Copy segments to another location
For multi-unit owners with more than one location in LoopSpark, you can copy saved segments between locations.
To copy a saved audience segment from one location to another:
- Select the segment from the
custom segmentdropdown menu located on your client list page - Click the cog icon
settingslocated on the right side of the screen, aligned with your audience name - Click
Copy this segment to another studio... - Select the location you’d like to copy this segment to
- Click the blue
Copybutton to confirm.
Deleting Segments
Audience segments can be deleted; however, if you prefer to keep the audience segment but remove it from your custom segment dropdown, please refer to Manage Segments
To delete a saved audience segment:
- Select the segment from the
custom segmentdropdown menu located on your client list page - Click the red trash can icon located on the right side of the screen, aligned with your audience name
- Click red button
yes, delete itto confirm.

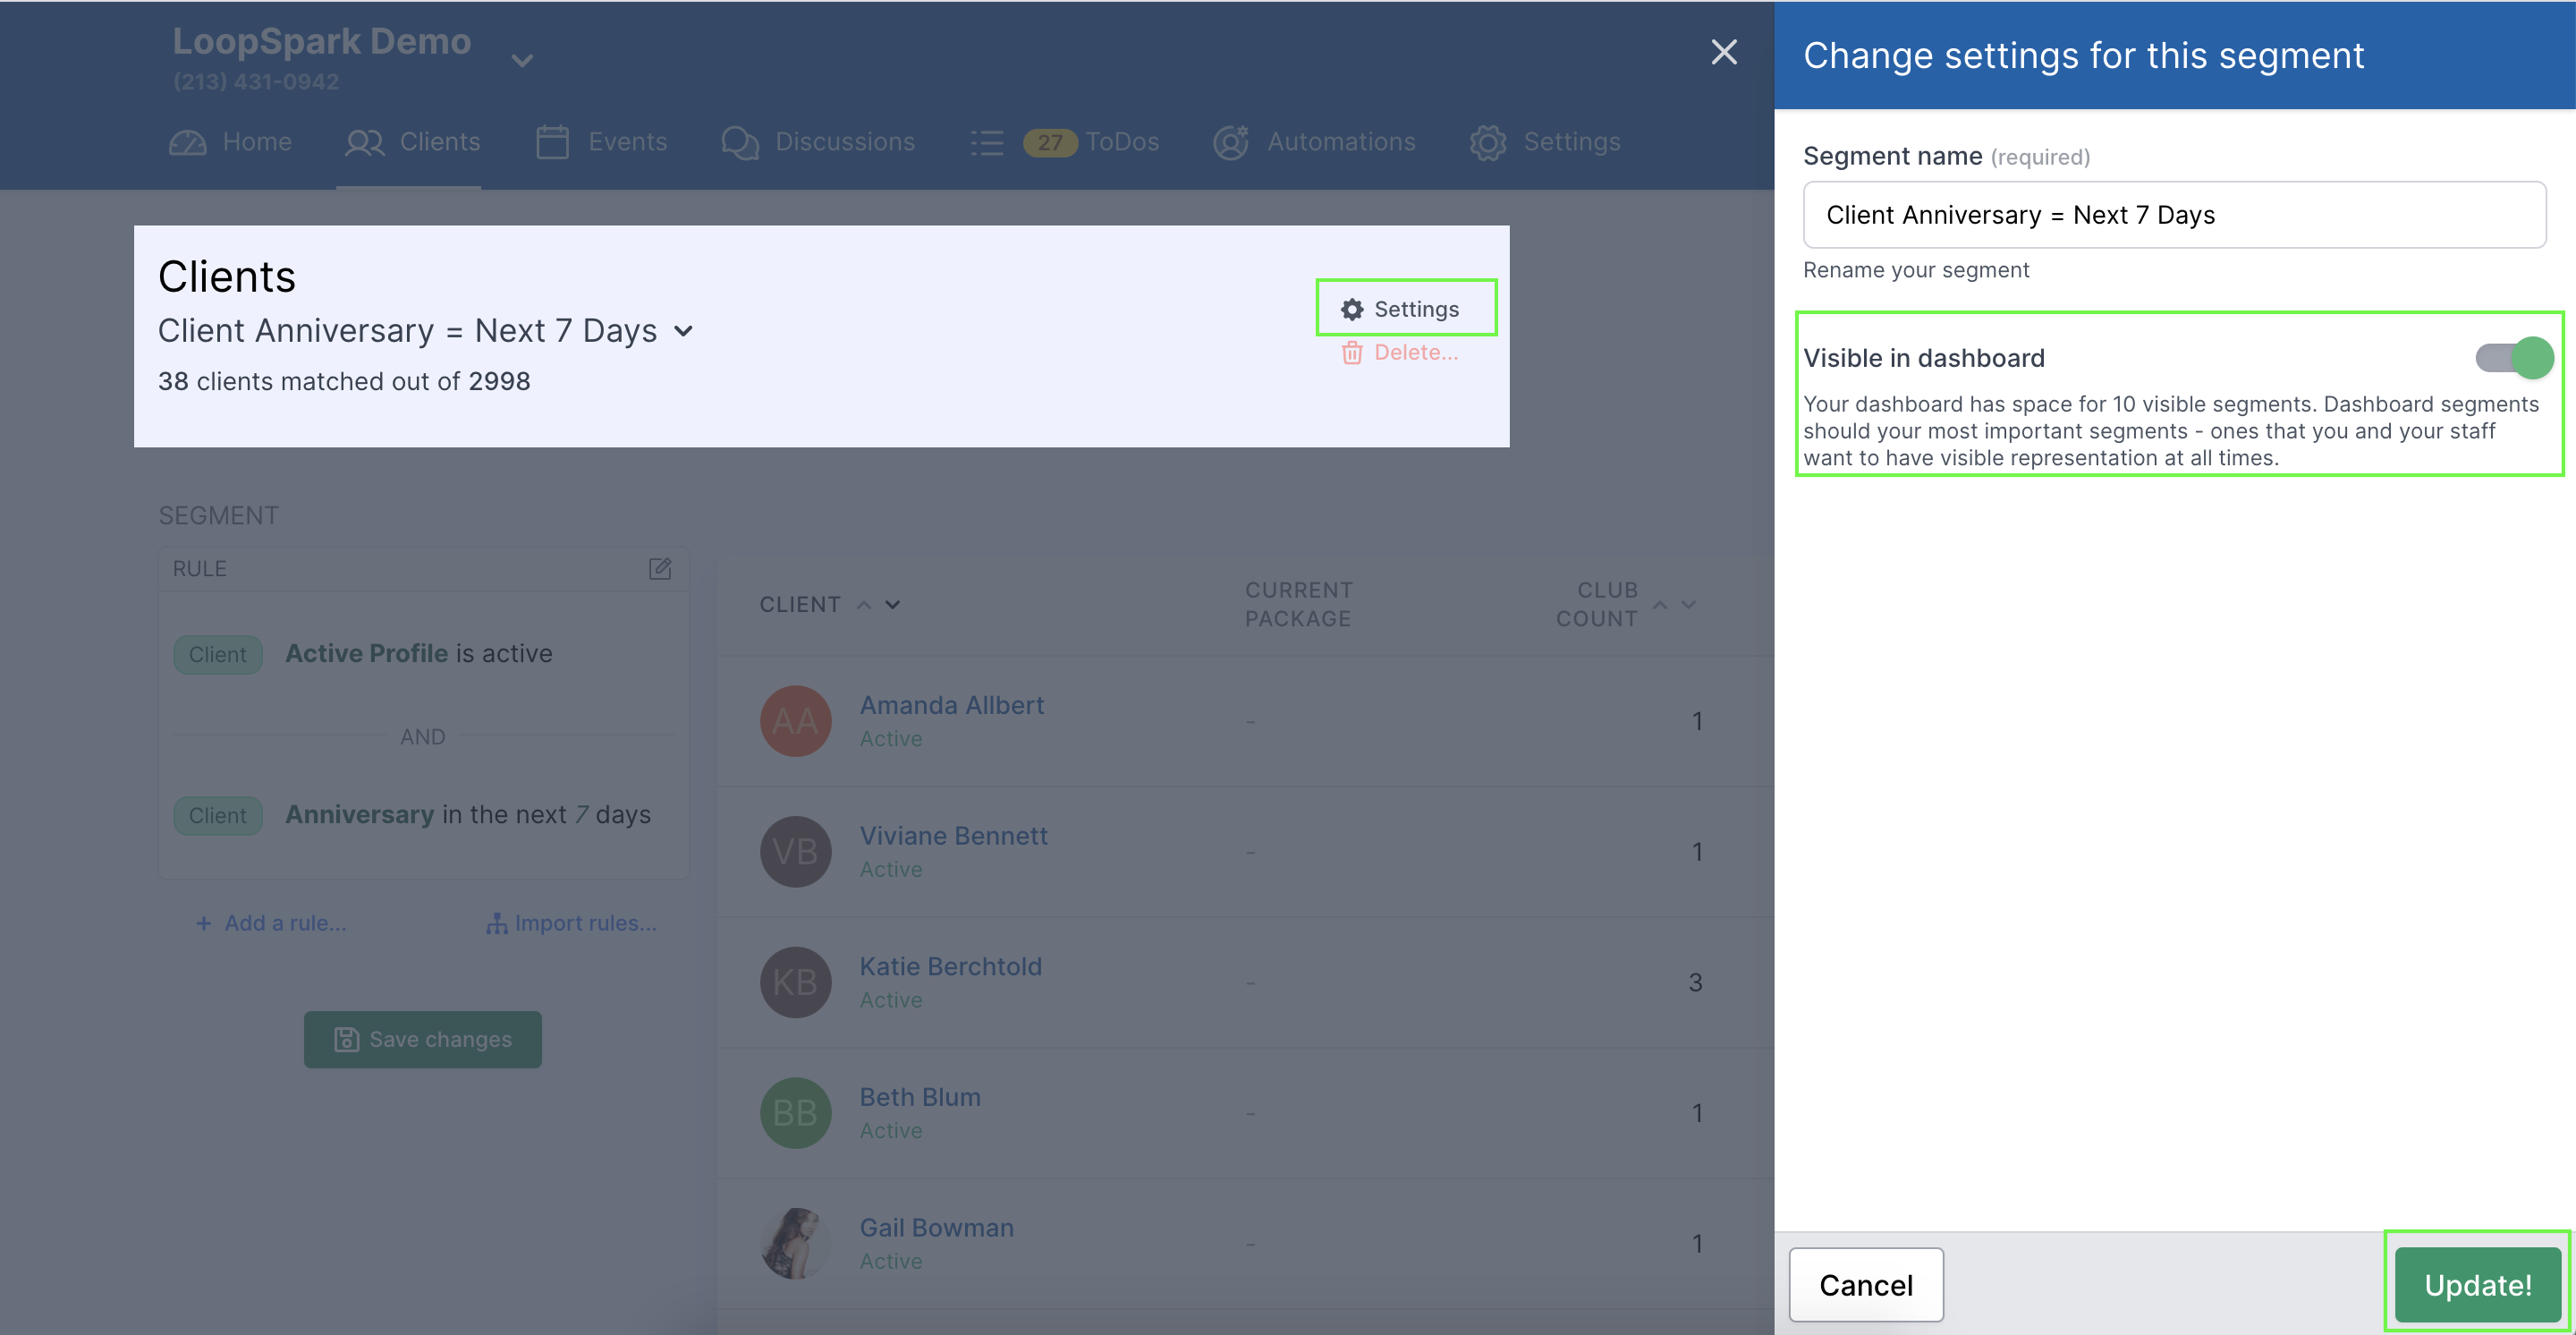
Making Segments Visible on Dashboard
Your dashboard has space for 10 visible segments (although you can save an unlimited number of segments in your account).
If you already have 10 segments displayed on your dashboard, make sure to remove a few segments from your dashboard to make room for new dashboard segments by following the steps below.
Dashboard segments should your most important segments - ones that you want your staff to have visible representation at all times.
Examples of popular dashboard segments:
- Approaching milestone classes
- Auto-pay clients with no visits in 14+ days
- Packages expiring in next 7 days
- Clients with upcoming first visit
- Clients that are visiting a class type for the first time today
- Clients attending today that are celebrating an anniversary
To make segments visible on your dashboard:
- Select your desired segment from the dropdown list on your client list page
- Click the cog icon located on the right side of the screen, aligned with your audience name.
- Click toggle for
visible on dashboardso that it becomes green (click toggle to grey to remove segment from dashboard) - Click "update"
Re-Ordering segments:
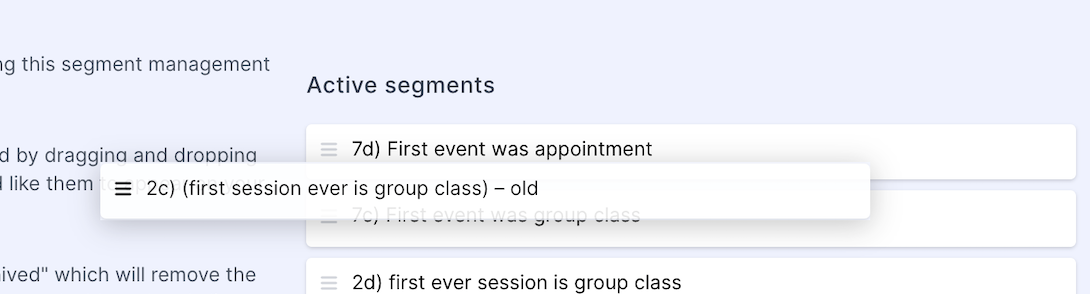
Changing the order in which a segment appears both on your dashboard and client list page will help you and your staff access the most important segments/reports more easily.
Important
Keep in mind only 10 audience segments can be visible on your dashboard. If you have more than 10 segments marked as visible on dashboard only the first 10 segments, based on segment order, will be visible on your dashboard.
- Click on the navigation item Settings -> Manage Segments
- Select the segment you want to archive from the left column
Active Segments - Drag the selected segment to the position you'd like it to appear (keep the segment in the left column
Active Segments - Scroll to bottom of the page and click
Save Changes
Archiving Segments:

Archiving a segment will allow you to remove "clutter" from your list of saved segments, while maintaining the segment for future use. You can also delete a segment if you never intend on using it again.
- Click on the navigation item Settings -> Manage Segments
- Select the segment you want to archive from the left column
Active Segments - Drag your selected segment to the right column
Inactive segments - Scroll to bottom of the page and click
Save Changes