Form Setup Step 1: Form Settings
The first step to setting up a new form or waiver will be completing the form settings. Watch the video below for a full walk-through or read step-by-step directions.
Form Settings: Video Walk-through
General Information
Similar to creating an automation in LoopSpark, the general information in form settings will help you organize and describe your forms. There are 3 fields you’ll need to complete in this section:
Name
The form name will only be visible to you and your staff; clients will not see you form name. It’s important to be as descriptive as possible when naming your form or waiver. As forms and waivers might need versioning (archiving previous forms and creating new versions), we recommend adding a version in the form name.
Form Name Examples:
- Bad name:
Form 1- this name makes it difficult to understand the purpose of this form - Better name:
Waiver- this name is slightly better, indicating the purpose of the form is a waiver. - Good name:
Liability Waiver - Version 1- this name is much better, making it clear this form is a specific type of waiver “liability waiver,” and includes a version “version 1” incase this form needs to be versioned (archived and replaced with an updated version).
Category
Organizing your forms into categories will help you and your staff keep track of your various forms, waivers, surveys etc. When clients complete waivers, the completed waivers will also be categorized in their LoopSpark client profile.
You can either select an existing category name, or create a new form category by typing the name in the category box and tapping enter on your keyboard.
Form Category Examples:
- Liability Waivers
- Surveys - Client Experience
- Surveys - Client preferences
- Retail - Order Forms
Description
Form description is not required, but will help you and your staff understand the purpose of the form and any relevant information such as form purpose, form build date etc.
Form Description Examples:
- Bad description:
Survey- this description is not very unique, as your business might have many surveys. - Better description:
Retail survey sent May 2022- description is better, indicating the type of survey and when it was created. - Good description:
Retail survey sent May 2022 to all active clients requesting legging sizes for Summer retail pre-order.This is a much better description, indicating the purpose of this form, who it will be sent to, and what information you are hoping to collect.
Form Settings
The form settings section has three primary settings:
- Form Title (visible to clients) - Let your clients know what they’re about to complete.
- Save a PDF - used for waivers and important client documents
- Allow new clients - Can the form be accessed by people that don’t exist in your booking software?
Form Title (visible to clients)
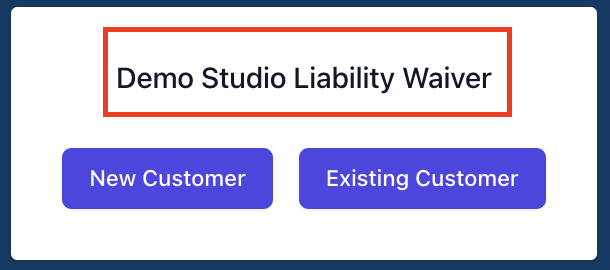
The Form Title (visible to clients) will be displayed to clients when they are selecting the option to find their existing account or create a new account.
Your title should describe the form your client is about to complete, such as Business Name - Liability Waiver or Fall Inventory Pre-Order
Save a PDF
Is this form going to be used as a waiver, such as:
- Liability waiver
- Childcare waiver
- Physical Activity Readiness Questionnaire (PAR-Q) or similar formal document?
If Yes, then select the toggle for Save a PDF.
Save a PDF will:
- Save the completed form submission as a PDF version in the client’s LoopSpark profile.
- Email a copy of the completed form as a PDF to the client.
- Pop up another option for Send a copy , as described below
Send a copy
In addition to sending a PDF copy to the client, you can forward a copy of the completed form to an email of your choice. We recommend adding either your studio email address, or email address of a studio manager or owner.
Upload completed PDF to Mindbody
Selecting this option will upload a copy of the completed PDF to the existing client's "Documents" section on MINDBODY. Warning: If Create a profile in Mindbody is NOT selected, new leads will NOT upload a completed PDF to Mindbody. Their PDF will be saved in LoopSpark.
Mindbody_only
The feature of uploading a completed PDF form to client’s document section on booking software is currently only available to Mindbody customers.
Update profile in Mindbody
Select this option if you'd like a user's form responses to update client records in Mindbody. If selected, you will have the option to map form fields back to specific Mindbody client profile fields.
For more information on Mindbody profile field mapping, please refer to Mindbody Profile Field Mapping
Mindbody_only
The feature of updating client records based on form responses is currently only available to Mindbody customers.
Allow new clients
Will your form be accessed by people that might not exist in your booking software? Walk-in clients, for example, might not have created a profile on your booking software but may need to complete your liability waiver before attending their first class. By selecting allow new clients, people viewing your form will have two options:
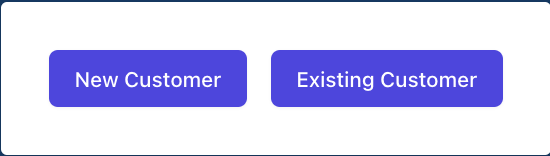
- New Customer - Client will enter their first name, last name, and email address to access your form. These new clients will create Lead Profiles in LoopSpark, this will not result in a client profile being created in your booking software. To learn more about Lead Profiles in LoopSpark, please refer to Lead Segments . If an existing client selects this option and enters a name and email matching an existing client profile, they will receive the following error message It appears that you are already a client. Please refresh the page and select “Existing Customer”
- Existing Customer - Client has an existing account on your booking software. Existing customers will be required to enter First Name, Last Name, and email address that matches the information from your booking software.
Create a profile in Mindbody
If your form allows new clients, clicking this toggle will create a client profile on Mindbody following form submission. If you’ve also selected the toggle Upload completed PDF to Mindbody , the completed form will also be uploaded to the newly created client profile on Mindbody.
Mindbody_only
The feature of creating a client profile on your booking software is currently only available to Mindbody customers.
Thank you settings
Once a client completes your form, what would you like them to see? There are two options for this setting:
Custom Thank You Message
If you don’t need to redirect your clients to a specific website after form completion, you can add a custom thank you message which will serve as confirmation that the form was submitted successfully.
Redirect to URL
We recommend this option. After a client completes their form submission, they will be redirected to a website of your choice. This is helpful when continuing a client down the client journey (example: redirecting them to your website to make their first purchase, book their first class etc), or redirect the client to your website where tracking pixels can be placed.